Managing Scientific Python environments using Conda, Mamba and friends
Posted by Robert Haase, on 8 December 2022
TL:DR: This blog post gives short instructions and explanations to demystify how some scientific Python programmers, including myself, organize their coding environment for the sake of reproducibility of science. We will see what conda and mamba are, what they are good for, and how to use them properly. We will also take a short excursion on how things can be screwed up.
Introduction: Conda environments
Nowadays, many Scientific Python Programming courses ask their attendees to install some form of Conda in advance. Conda is package manager, a software that allows you to install other software. It aims to make sure that anything you install is compatible with each other. This can be tricky for example if you try to combine recent software with outdated tools from a couple of years ago. Package managers are not new. Operating systems use them already for decades and users do not really notice. The difference between package managers on operating system level and in Conda is: If you screw up your operating system by installing a wrong software, you will have a hard time. If you screw up a Conda environment by installing the wrong software, you just delete the environment and create a new one. Furthermore, you can easily share a conda environment with colleagues. Sharing your operating system will all installed programs is much more tricky. This is it. This is what Conda is for. It makes our life easy in the context of installing software and maintaining collections of software, a.k.a. Conda environments.
Conda exists in in multiple flavours, such as:
Without going in the nitty-gritty details of differences, I claim that the instructions below will work with all of these. The only difference is: If you go for Anaconda or Mini-Conda, please install Mamba into your base environment. Btw. I am not using the graphical user interface Navigator, because I like to introduce you to reproducible ways for working with Conda and this is the most straight forward by using 2-3 commands from the terminal.
Conda versus Mamba
Update 2025: This section is outdated and just kept for historical reasons. If you use a recently installed mamba or conda makes hardly any difference regarding installation times. This is because mamba was built-in into conda. Read more.
When you’re using Anaconda or Mini-conda, you can call the command
conda install some-program
to install some program. If you go for Mamba or Mamba-forge, you can still do that, but you can also call
mamba install some-program
Mamba and Conda will then install the software, but Mamba does it much faster. This is why more and more people are switching to Mamba, even though sometimes tiny differences in installations can be observed.
Installing mamba-forge
I’m going to show how to install Mamba-forge, because it comes with Mamba preinstalled and it has a download channel activated, Conda-Forge, an open-source community-maintained resource where most of my favorite Python packages can be downloaded from. When installing Mamba-forge / Mini-conda / Anaconda, I recommend installing it for Just me and activating Adding it to the PATH.
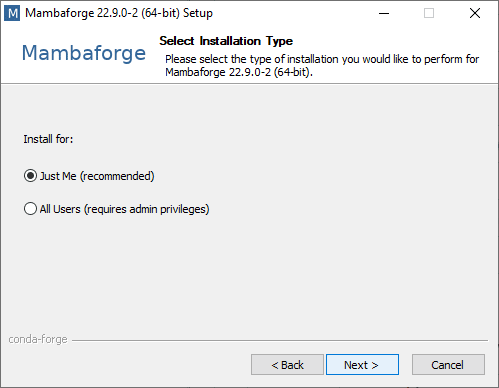
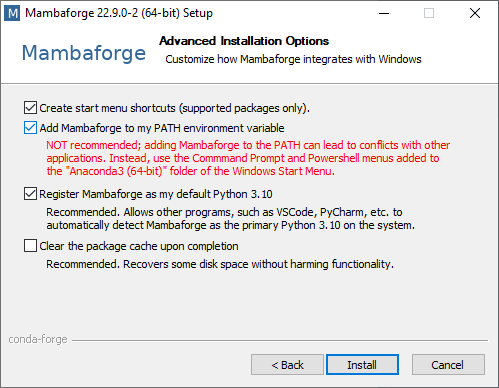
If you installed it for all users, installing packages will be harder later. If you don’t add it to the PATH, you need to use the Anaconda prompt from the Start Menu (or non-Windows equivalents). Conda and Mamba would then not work from any Terminal window.
Setting up an environment (for each project)
This is the most important step: You should set up a Conda environment for every single project you work on. Of course, you can reuse environments in multiple projects and you could install any software into the base environment (Don’t do it! And read below why). However, if you at some point notice that one project does not work anymore because you installed software for another project, please remember: Set up a Conda environment for every single project.
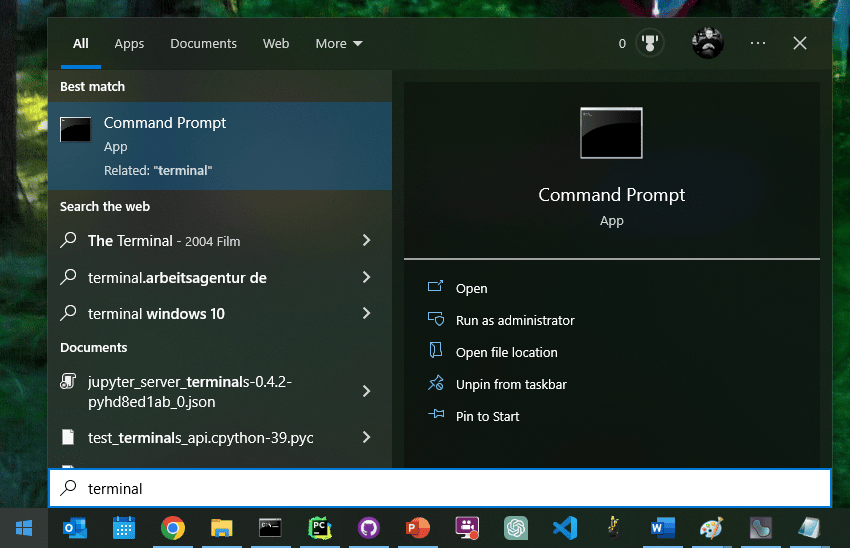
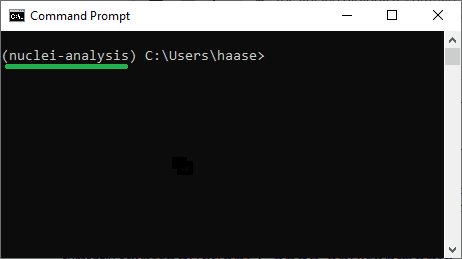
This is how it works: Assume you want to work with Python 3.9 and Napari in a project called nuclei-analysis. Open the Terminal e.g. by typing Terminal in the Windows Start menu or in MacOS or Linux launcher.
You can then create an environment from the command prompt like this:
mamba create --name nuclei-analysis python=3.9 napari -c conda-forge
In this command we specify the environment name (nuclei-analysis), we specify what software we want to install (python=3.9 napari) and we specify where to download it from (-c conda-forge). Afterwards, we can activate the environment. The term activate can be compared to turning on the operating system given the example comparison above.
mamba activate nuclei-analysis
Whenever you come back to this project, you can activate the environment and all the software will be there you used last time. We can start installed software, e.g. Napari, like this:
napari
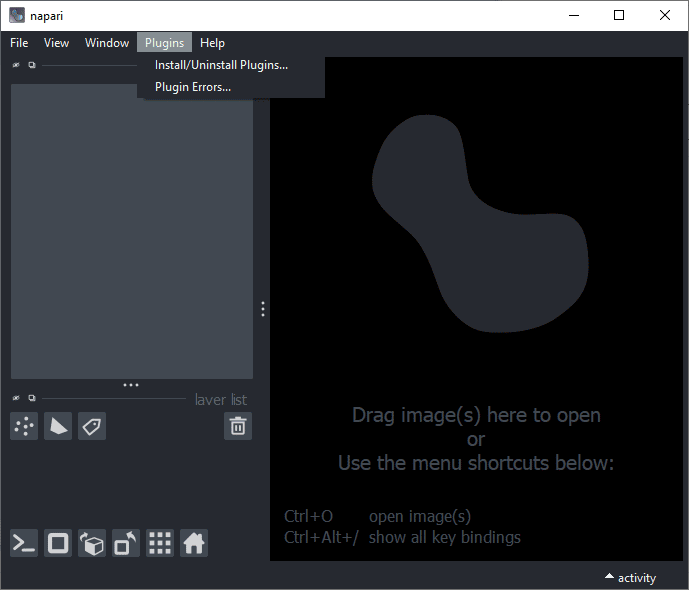
Voila, Napari runs, but has no plugins installed yet.
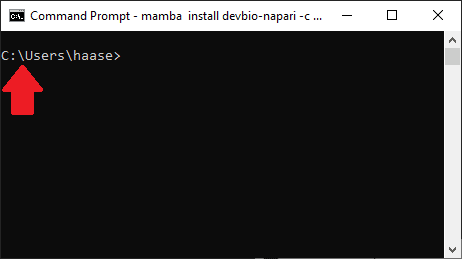
We can also install additional plugins, e.g. the plugin distribution devbio-napari, using this command:
mamba install devbio-napari -c conda-forge
If we start napari then, it will have plugins and tools installed:
napari
In daily routine this is perfectly fine. What you may discover later: It is important to note down which software and plugins you installed. The day will come where your Conda environment is broken because intentionally or not, you installed another software that somehow screwed it up. From my own experience I can tell that it is close to impossible to prevent this. It will happen anyway, it is just a matter of time. If we wrote down what software we installed, we can easily set up another Conda environment with all our favorite software and plugins. All we need to do is to maintain this single command line where the software is listed we need for our work:
mamba create --name nuclei-analysis2 python=3.9 napari devbio-napari -c conda-forge
This single line does not just allow you to rebuild your Conda environment any time, it also allows you to share it with others. This is key for reproducibility of science. Speaking of reproducibility, when archiving a project or sharing installation instructions with a publication, you should additionally specify versions of the libraries you used:
mamba create --name nuclei-analysis3 python=3.9 napari=0.4.17 devbio-napari=0.8.0 -c conda-forge
Specifying versions versions like this allows you to make sure that this environment can be rebuild and your Python code works in it mid-/long-term. But also keep in mind that the world keeps turning. If you continue working with napari=0.4.17 while others move on and use napari>=0.5.0, your stuff may become incompatible with other state-of-the-art tools. Recommendation: When you develop a data analysis workflow, do not specify versions. As soon as the workflow is finished, fix versions and do not change them during the project and publish the versions of Python libraries you used, e.g. in a Supplementary Table.
Removing environments
Before you can rebuild an environment, you should delete the old one. This can be tricky, in particular on Windows. The command for this is:
conda env remove --name nuclei-analysis
Unfortunately, this sometimes doesn’t work. In that case you need to navigate to the folder where your environments are and delete it yourself. This is typically in this folder:
C:\Users\<your-username>\mambaforge\envs
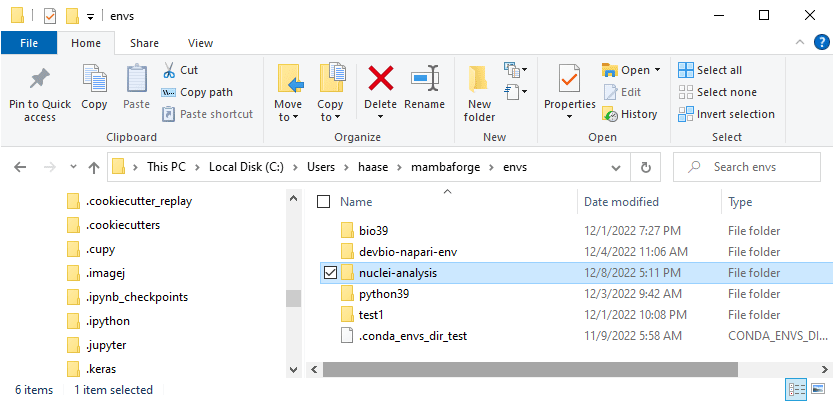
Note: Do not mess around here! These folders are not meant to be manipulated by humans. You can cause terrible issues if you modify files and folders here.
Conda environments, pip installations and mixing strategies.
The procedure introduced above is quite bullet-proof. However, it is also limited. Not all Python packages are available via Conda and also some Conda-packages are not compatible with each other. In these cases, many Python programmers, including myself, use pip install some-software to install what they need. Let me rephrase that: In case Conda-packages are incompatible, I use another package manager, pip, to install them. I hope the problem is obvious. We are installing incompatible software. This may cause trouble. Sometimes, this is necessary to move projects forward, but it also comes at risks. Conda environments that contain incompatible software, may not be reproducible. This is why I recommend: Use this strategy if necessary and avoid it if possible. Try to install everything with Mamba/Conda and you will not regret. And one more thing: If you meet incompatible Python packages, please tell it the developers. Only if we communicate those issues, there is a chance that they get resolved at some point.
Do not install anything in the base environment
Before installing anyhing, please make sure you have an environment activated that is not base.
Please do not install software into the base environment or otherwise programs may be confused. The only exception is Mamba because Mamba organizes the environments for us.
To illustrate one scenario, I have screwed up my base environment earlier and took screenshots for you. In case there is software installed in the base environment unintentionally, this may happen: Assume you activated an environment C and install a package called stackview:
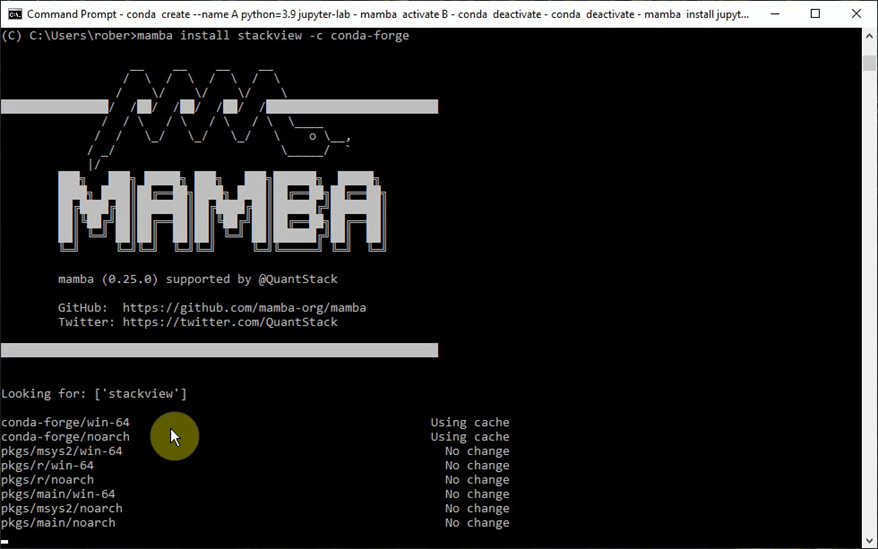
The installation goes all fine:

However, if afterwards you try to import stackview in a Python Jupyter Notebook, and it fails with an error claiming that stackview is not installed:
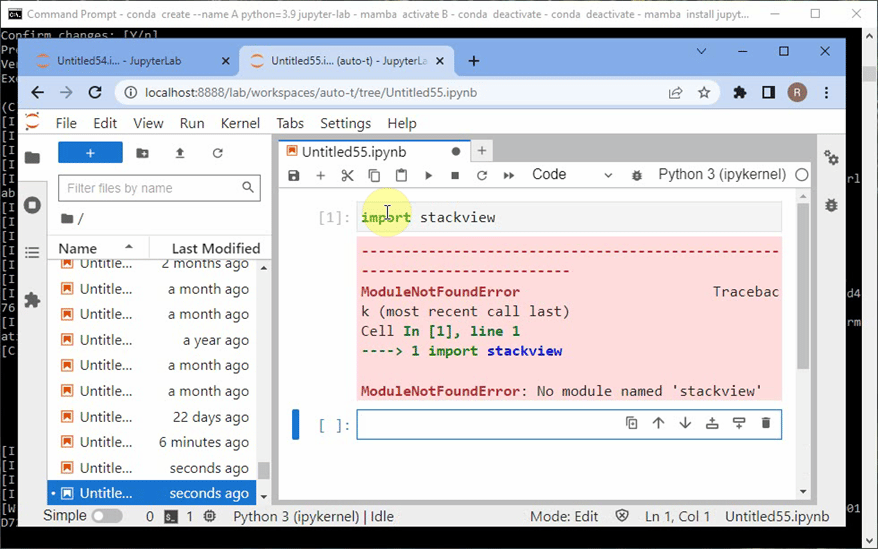
In this case, Python cannot find the package, because I installed Jupyter Lab (the code editor shown above) in my base environment. From there, only packages are visible that are installed in the base environment. However, I installed stackview in the environment C.
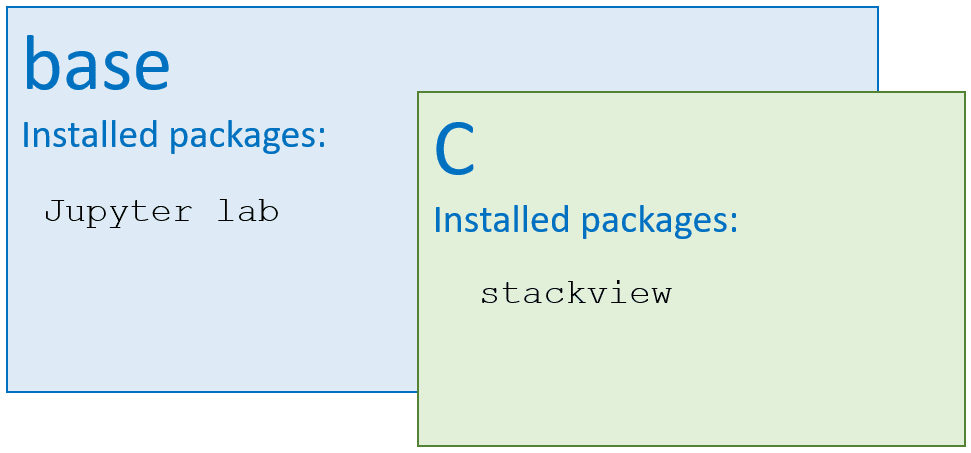
This trivial example shows how Python can be confused with installed packages between environments. Now imagine, you have carefully set up multiple Conda environments for specific projects and everything works all fine. If you then install software into the base environment it is hard to predict which of the carefully crafted environments still work. Lesson learned: Never install anything into the base environment. In case you did, the only way back may be uninstalling and reinstalling conda, and setting up all conda environments from scratch. I have done that approximately 20 times (as for end of 2022) and cannot recommend the experience.
Take home messages
- Conda environments are good for reproducing what software we installed in a specific scientific project.
- Conda and Mamba do in principle the same.
- If a Conda environment breaks, this is no big deal, because we can rebuild it any time.
- Conda environments can also be shared with colleagues.
- Do not install anything in the base environment.
Further reading
- Introduction to Python Environments and Why are there lots of ways to get Python? by Juan Nunez-Iglesias
- Python environments workshop by Talley Lambert
- Getting started Python and Anaconda by Johannes Müller
- Scientific Data Analysis with Python and how to transition from ImageJ Macro by Robert Haase
Feedback welcome!
As usual, feedback is very welcome. In case I formulated anything unclear, I’m happy to update the post. Just let me know.
Reusing this material
This blog post is open-access. Figures and text can be rused under the terms of the CC BY 4.0 license unless mentioned otherwise.
 (7 votes, average: 1.00 out of 1)
5 thoughts on “Managing Scientific Python environments using Conda, Mamba and friends”
Leave a Reply
Write a ‘How to’ post
Create an account or log in to post your story on FocalPlane.
More posts like this

Filter by
- NewsApply
- DiscussionsApply
- How toApply
- ToolsApply
- Case studiesApply
- InterviewsApply
- JobsApply
- EducationApply
- Blog seriesApply
- Latin America Bioima..gingApply
- From Zero to Qupath ..HeroApply
- Asian Microscopists ..and Cell BiologistsApply
- AIC at HHMI JaneliaApply
- Deep Learning for Bi..o-image analysisApply
- GloBIAS – updates fr..om the communityApply
- WAMBIAN: West Africa.. in FocusApply
- Volume EMApply
- Latin American Micro..scopistsApply
- Bio-image Analysis w..ith NapariApply
- Imaging with…Apply
- Towards Global Acces..sApply
- Highlights from Euro..-BioImagingApply
- LSFM seriesApply
- DIY MicroscopyApply
- View all
Thanks Robert, this is really helpful to for beginners (like me)!
Maybe it’s obvious, but do I understand correctly that “Mamba does it much faster” refers to installation of packages? Meaning that after the packages are installed, there’s no difference in performance?
Correct! Mamba is faster than conda in determining which packages should be installed. The installation itself should be similarly fast and after installation there is no difference, too.
Hi Robert, thanks for a really useful piece. I have a naive question as someone new to this: do you think that the community should make more use of .yml for helping users to create ‘cookie-cutter’ standardized conda envs for people to be working off of? I kind of think this would help a lot of beginner/intermediate users – or do the conda/pip mixing problems make this too difficult?
Yes, I think so. Unfortunately, making environment.yml files that work on all operating systems can be tricky, especially when working with deep-learning, GPUs and other advanced stuff. That’s why installation instructions are sometimes a bit cumbersome. I hope this will change one day.
Unfortunately, I installed python and Conda on my Mac M1 before reading this piece. I think I have multiple versions of pythons and Conda but not sure how to get rid of all of these to start afresh and correctly. Any tips?