Annotating 3D images in napari
Posted by Mara Lampert, on 30 March 2023
This blog post revolves around generating ground truth in 3D images for segmentation. Therefore, we will define what ground truth is and how we can generate it using napari in a time-efficient way. We will also learn about difficulties of annotating alone or in groups and address possible solutions for both.
Challenges of image segmentation in 3D
Image segmentation in 3D is challenging for several reasons; for example image quality differs the deeper we go into the sample. Furthermore, it is hard to segment touching objects in an automated fashion. Moreover, voxel anisotropy is difficult to handle depending on the applied algorithm and provided parameters.
To achieve a successful image segmentation, it is sometimes needed to train a supervised machine learning model. Examples of these segmentation algorithms are StarDist or Plantseg.
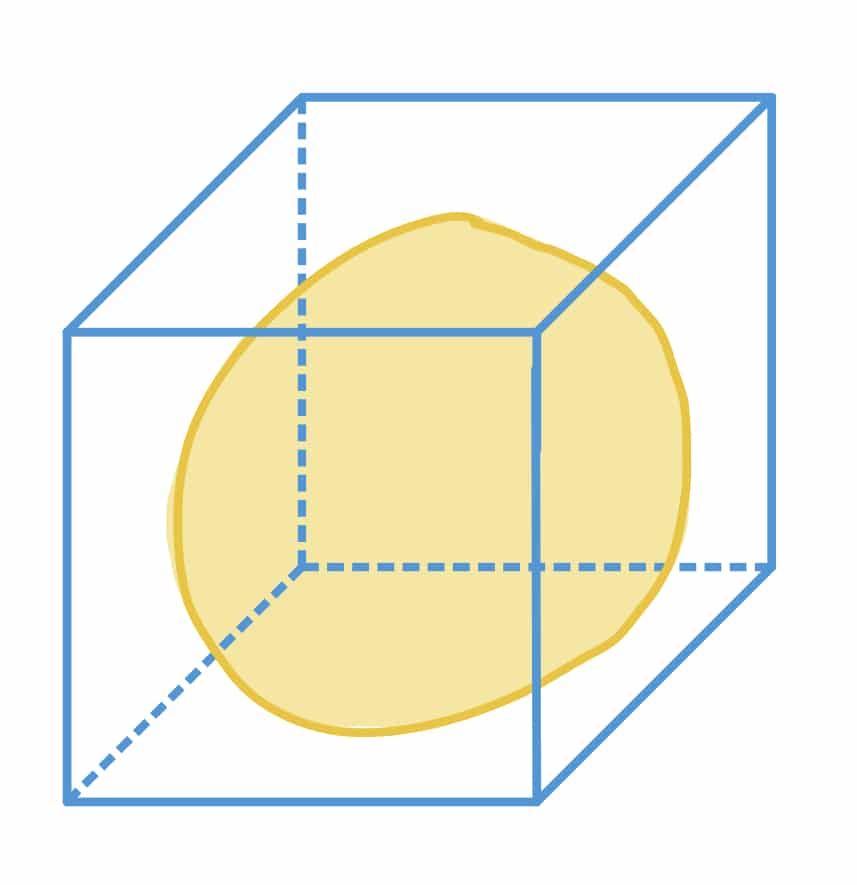
Ground truth is a term used in supervised machine learning to describe a dataset used as a basis for the training of a model. It is given by a domain expert which is a person knowledgeable in the scientific field in which the data was extracted. In image analysis, ground truth can be an annotation that is drawn on top of the original image. The resulting new layer is called a label image.
In 3D, these ground truth annotations can be time-consuming. Here, we will get to know different techniques of how to annotate in 3D.
For this, we will explore a dataset of the marine annelid Platynereis dumerilii from Ozpolat, B. et al licensed by CC BY 4.0. We will concentrate on a single timepoint and channel for our annotations.
For image visualization and annotation, we will use napari in this blog post.
Image visualization in napari
The following video is an introduction to the basic tools we can find in the napari graphical user interface:
In the graphical user interface of napari, we can switch between 2D and 3D view by either pressing the foursquare button in the bottom left corner or by pressing Ctrl+ y:


For a more detailed guide on the napari-GUI read this blog post.
Requirements
In this blogpost the following napari-plugins are used
Annotating in 3D using the napari-nd-annotator
The napari-nd-annotator is a tool that allows annotating objects in 2D or 3D. Below, we will explore how to annotate manually or to use bounding boxes to annotate some slices and then interpolate the other slices.
Installation Note: The napari-nd-annotator only runs on napari versions
0.4.15and0.4.16!
Manual annotation
You can see how to manually annotate and some useful tricks in napari in this video:
Generally, we’ll stay in the 2D view following these steps:
- Add and Select a
Label Layer. - Select the brush tool and adjust brush settings
- Manually draw an annotation for an object: Generally, we recommend to annotate at least one z-slice in the beginning, one in the middle and one in the end of the object.
- Use the slice-interpolation tool to interpolate the other slices: You can find it under
Plugins→napari-nd-annotator→Slice Interpolator. - Switch to a new object
- Change the label number and repeat steps 4 – 6
- Save the label layer:
File→Save Selected Layer(s)
Bounding boxes
There is also an implementation of bounding boxes in the plugin. You can watch this video from the documentation to see how to use bounding boxes.
Basically, the steps are similar to those for manual annotation above:
- Add a
Label Layer. - Select under
Plugins→napari-nd-annotator→Object List - Click on button
Create Bounding Box layer - Under layer controls of the Bounding Box layer select the rectangle tool
- Select individual objects with the bounding boxes: they are displayed in green
- Check in 3D view if the object is completely covered in z (if yes: continue; if no: delete the bounding box by clicking on x in layer controls)
- Choose an object from the object list: it is displayed in red and 2 new layers should show up + Projection tool.
- Manually draw an annotation for an object: Generally, we recommend to at least annotate one z-slice in the beginning, one in the middle and one in the end of the object.
- Use the slice-interpolation tool to interpolate the other slices: You can find it under
Plugins→napari-nd-annotator→Slice Interpolator. - Repeat steps 7 – 10.
- Save the label layer:
File→Save Selected Layer(s)
Personally encountered advantages and disadvantages of the different techniques
| annotation technique | manual | bounding box |
 |  | |
| advantage | reliable | objectwise memory storage, easier to concentrate on one object, automatic label colour change and projections |
| disadvantage | long duration | Might get confusing with long lists of objects |
Generally, I recommend using bounding boxes for annotation as they speed up the annotation process. Nevertheless, both techniques have advantages and disadvantages. Therefore, what you choose depends on what works best with your data.
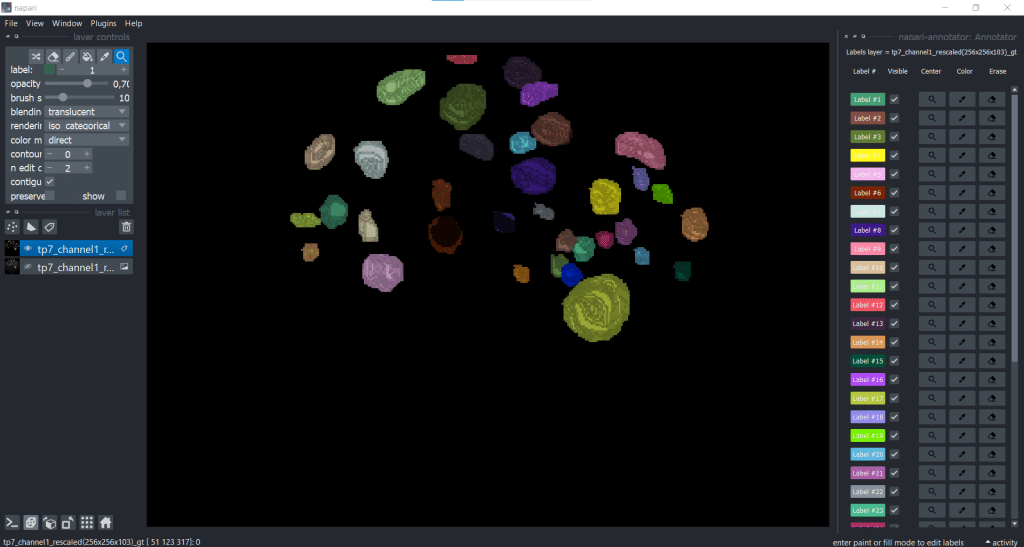
Keeping an overview of the labels using the napari-annotator
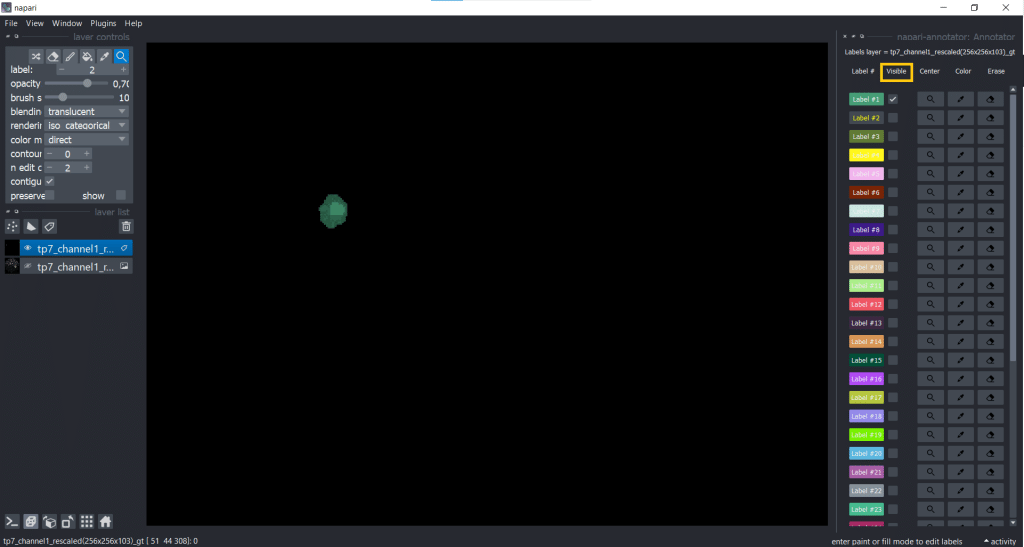
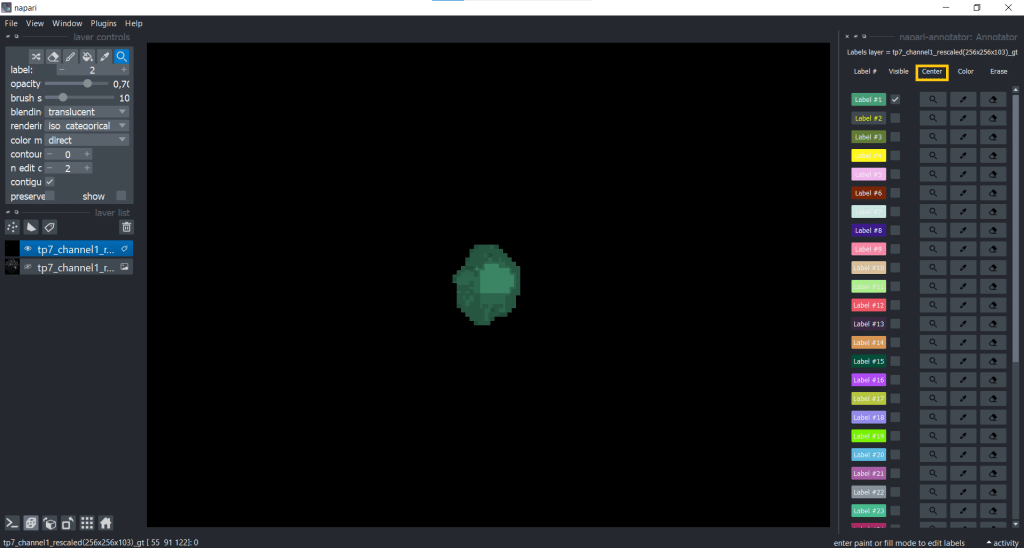
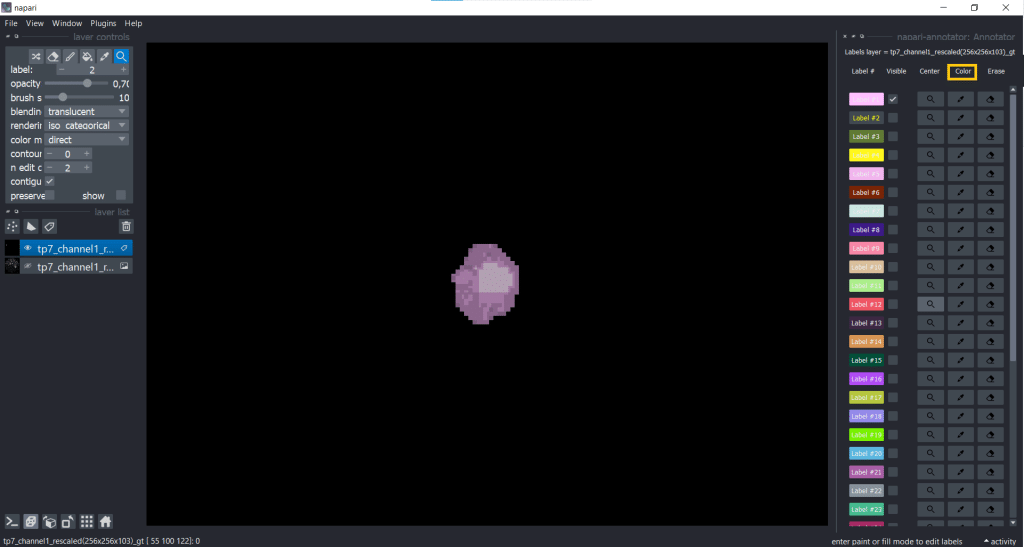
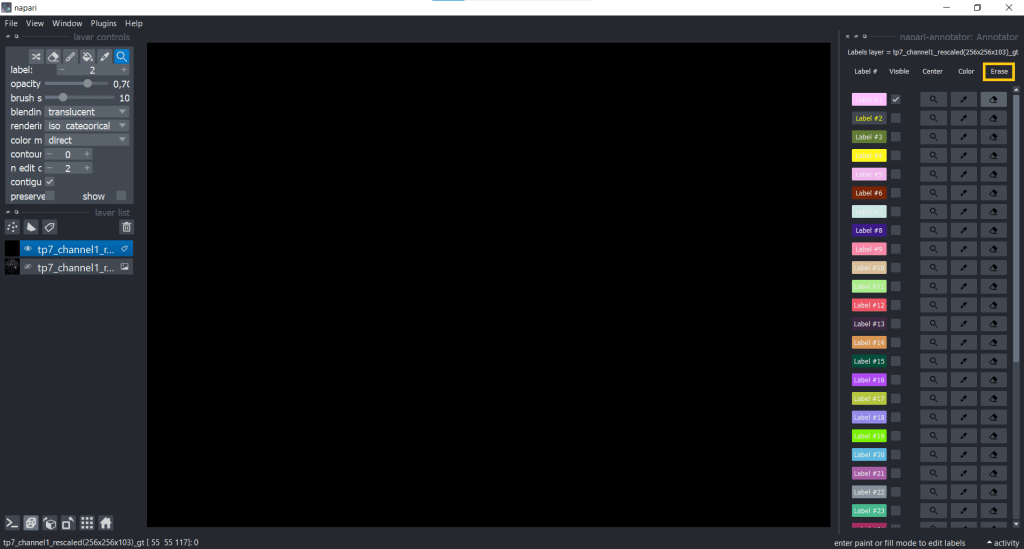
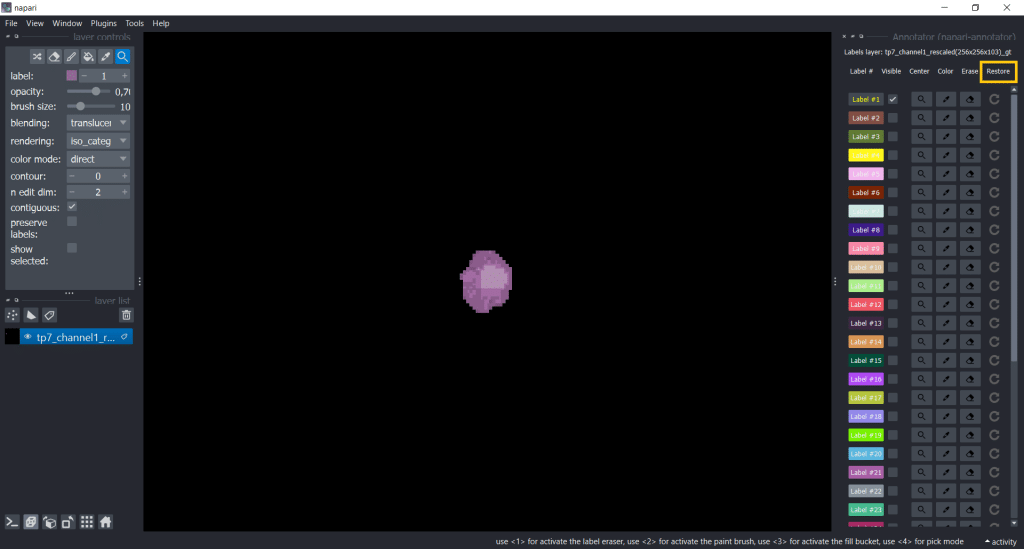
Another useful plugin for keeping an overview over annotations is the napari-annotator. This is handy as you can change the visibility of individual labels, center them and erase selected labels. You can find it under Plugins → napari-annotator: Annotator and on the right side now all Labels are listed like this:
You can change label properties using the checkboxes Visible, Center, Color, Erase and Restore:
| Visible | Center |
 |  |
| Color | Erase | Restore |
 |  |  |
One example when changing the visibility of labels can be helpful is when you want to annotate cells in a tissue. Then you can make surrounding cell labels invisible and concentrate on one label at a time. But be careful, when you make labels invisible and change something (erasing, drawing) on top of them, they will also be changed.
This plugin could also be used for post-processing after segmentation. However, better avoid changing segmentation results manually and rather change the parameters of the segmentation algorithm (e.g. threshold) for reasons of reproducibility.
There is no such thing as ground truth
The term ground truth is actually misleading because the way of annotating differs between humans (interpersonal annotations) and also within an individual (intrapersonal annotations). See the following table:
| interpersonal annotations | intrapersonal annotations | |
 | ||
| definition | = annotation differences between people | = annotation differences of one person |
| meaning | personal annotation-style, level of knowledge (how many datasets have you already seen/ annotated?), used annotation-tool, different screen (see below), different intensity settings for visualizing data | different moods, level of concentration (1 or 8 hours of annotating?), level of knowledge (how many datasets have you already annotated?), implemented annotation tools |
One of my favorite examples in this context is that the screen on which you display the data has an influence on the visibility and therefore also on your way of annotating. Check out this tweet for more precise statements and impressions:
In more general terms, there is often no status-quo about what and how we should annotate. It needs to be kept in mind that a chosen annotation method can bias the analysis, but for supervised machine learning, we need these annotations. Therefore, determining the right amount of information to provide for these annotations is crucial to minimize bias.
Document our way of annotating is important for reproducable results. Furthermore, it is important to transparently communicate potential bias and make it transparent by publishing the annotations with the data.
All points considered, I made an example jupyter notebook that can be used as a template to annotate together in groups but can also be used when annotating alone.
Take home messages
- Image segmentation in 3D is challenging but there are tools in napari which help to make your life way easier.
- Good quality ground truth is important for the training of a supervised machine learning algorithm.
- You can either annotate manually or use bounding boxes with slice interpolation.
- One ground truth will not equal another ground truth.
Further reading
Feedback welcome
Some of the napari-plugins used above aim to make intuitive tools available that implement methods, which are commonly used by bioinformaticians and Python developers. Moreover, the idea is to make those accessible to people who are no hardcore-coders, but want to dive deeper into Bio-image Analysis. Therefore, feedback from the community is important for the development and improvement of these tools. Hence, if there are questions or feature requests using the above explained tools, please comment below, in the related github-repo or open a thread on image.sc. Thank you!
Acknowledgements
I want to thank Dávid Bauer and Loïc Sauteur as the developers behind the tools shown in this blogpost. This project has been made possible by grant number 2022-252520 from the Chan Zuckerberg Initiative DAF, an advised fund of the Silicon Valley Community Foundation. This project was supported by the Deutsche Forschungsgemeinschaft under Germany’s Excellence Strategy – EXC2068 – Cluster of Excellence “Physics of Life” of TU Dresden.
Reusing this material
This blog post is open-access, figures and text can be reused under the terms of the CC BY 4.0 license unless mentioned otherwise.
 (7 votes, average: 1.00 out of 1)
Get involved
Create an account or log in to post your story on FocalPlane.
More posts like this


Filter by
- NewsApply
- DiscussionsApply
- How toApply
- ToolsApply
- Case studiesApply
- InterviewsApply
- JobsApply
- EducationApply
- Blog seriesApply
- Towards Global Acces..sApply
- Latin America Bioima..gingApply
- From Zero to Qupath ..HeroApply
- Asian Microscopists ..and Cell BiologistsApply
- AIC at HHMI JaneliaApply
- Deep Learning for Bi..o-image analysisApply
- GloBIAS – updates fr..om the communityApply
- WAMBIAN: West Africa.. in FocusApply
- Volume EMApply
- Latin American Micro..scopistsApply
- Bio-image Analysis w..ith NapariApply
- Imaging with…Apply
- Highlights from Euro..-BioImagingApply
- LSFM seriesApply
- DIY MicroscopyApply
- View all